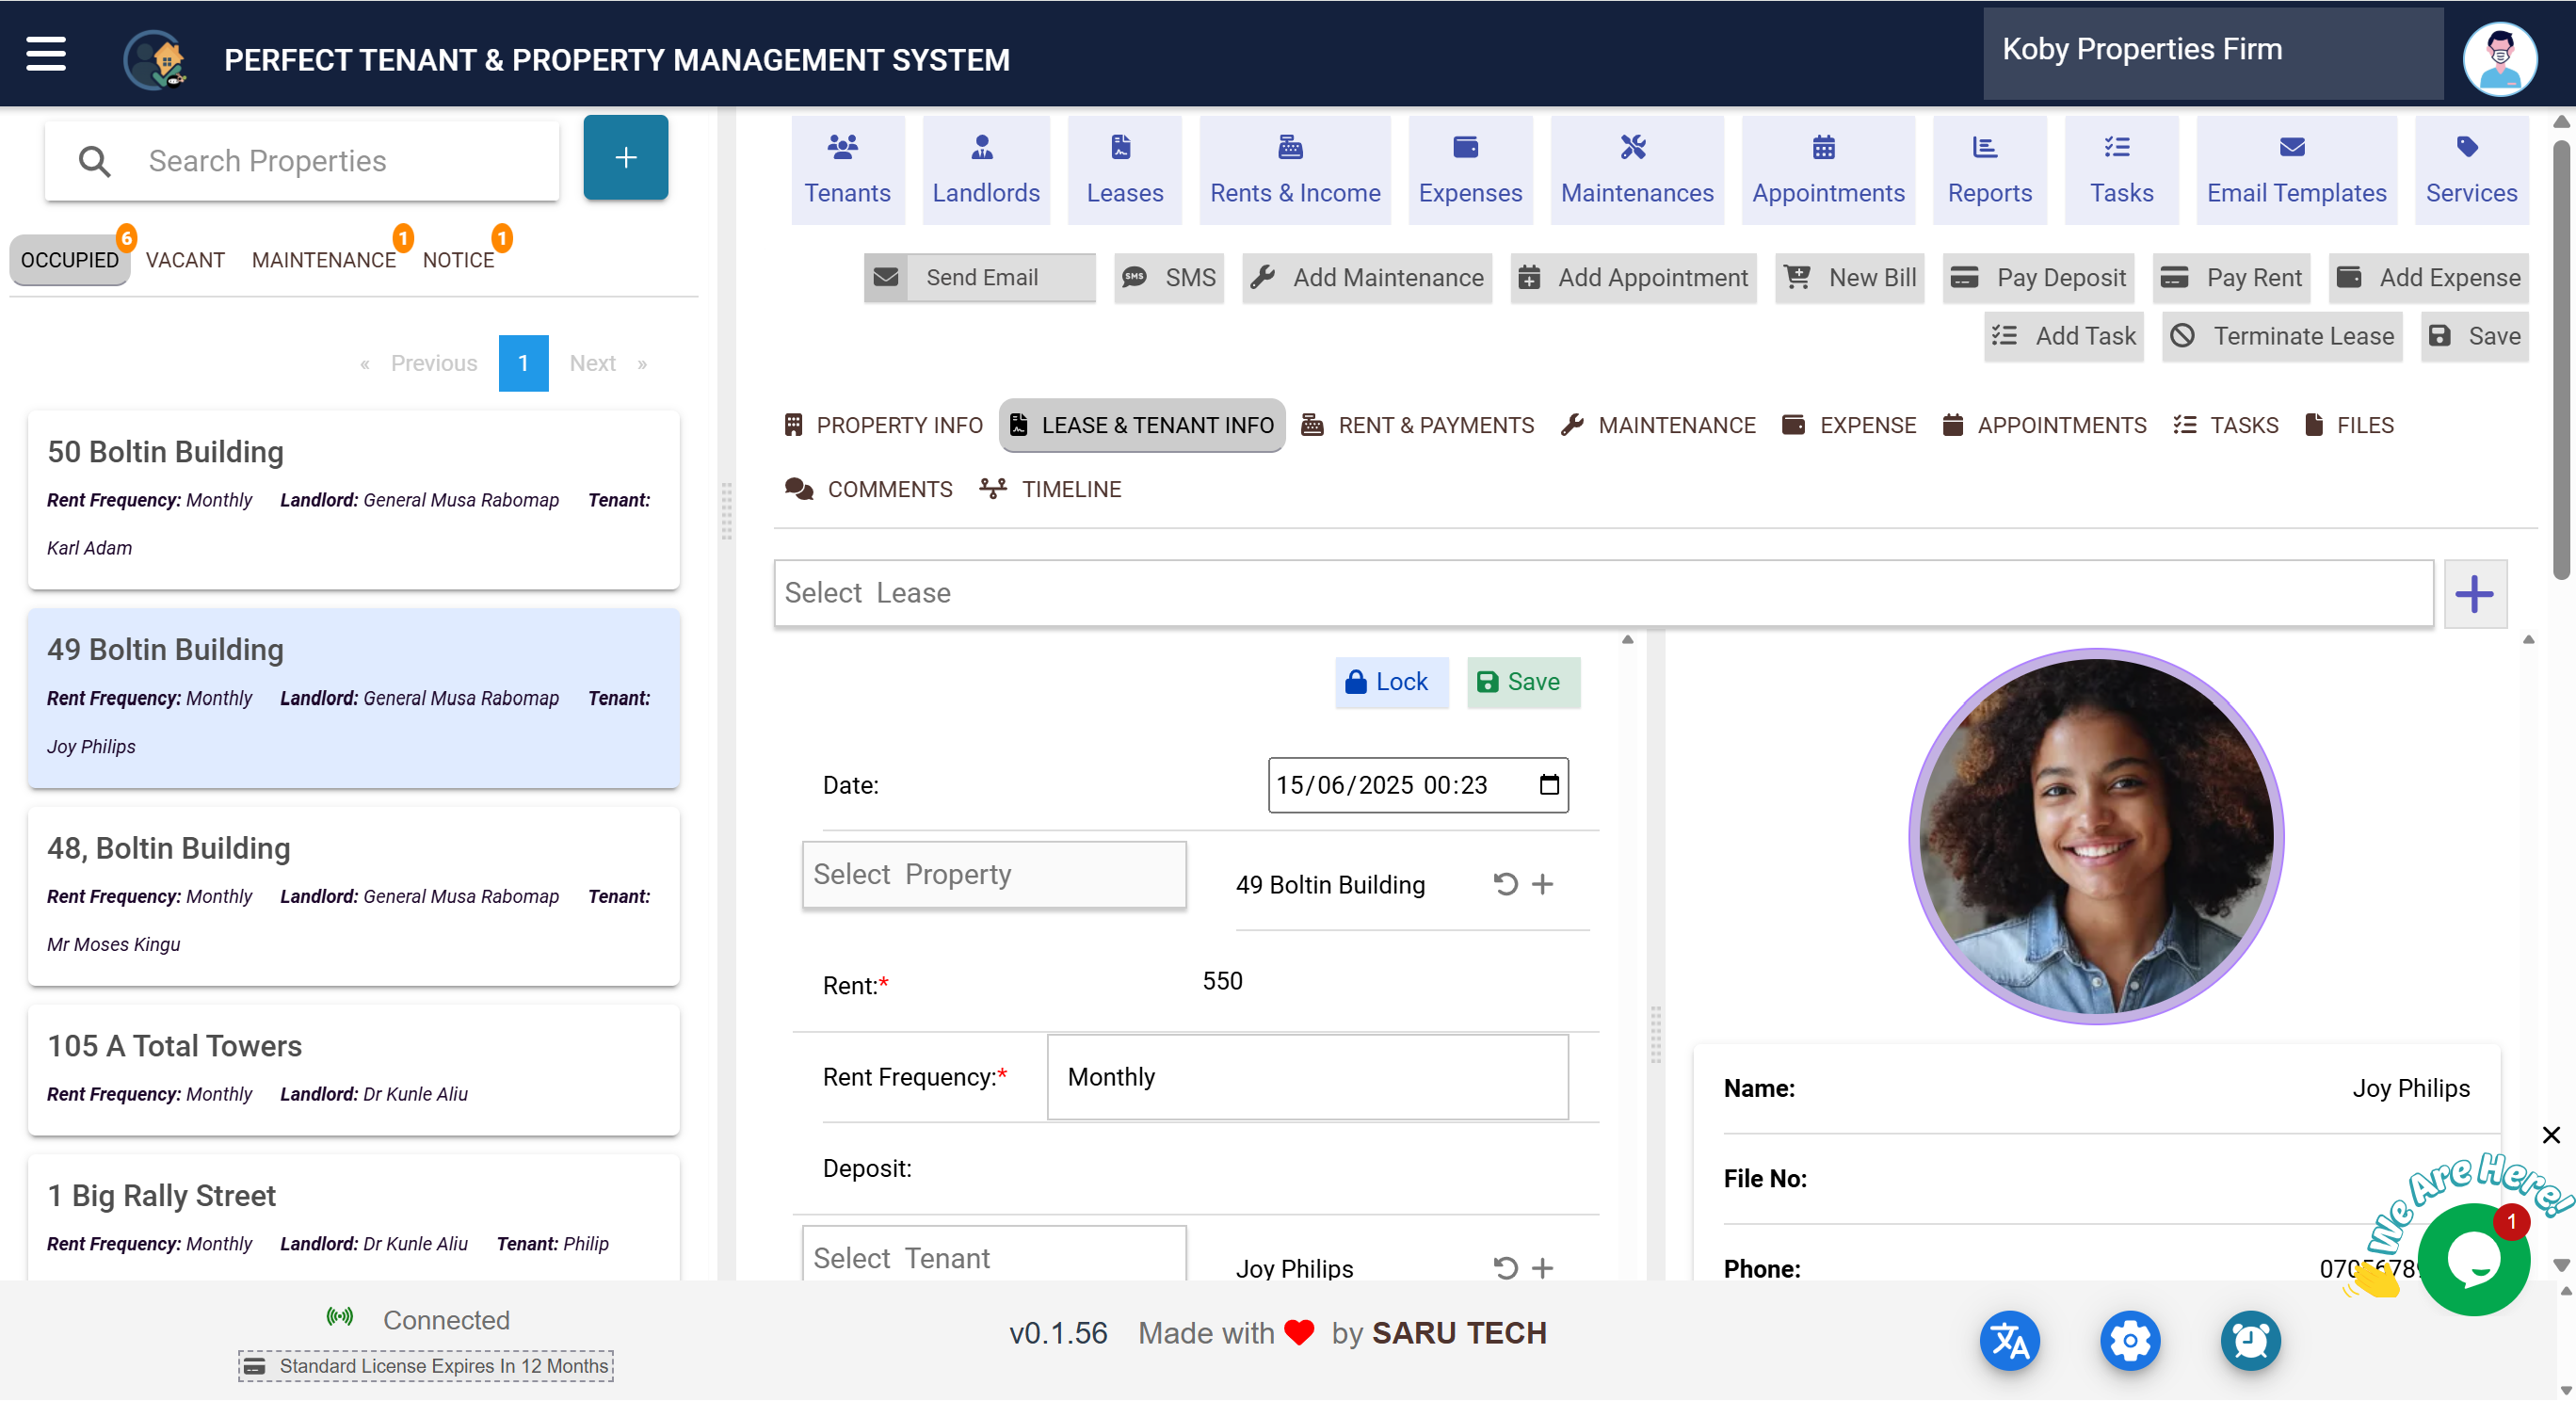
📄 How to Add and Manage Lease on a Selected Property
The Lease & Tenant Info tab lets you set up rental agreements and manage tenant details for any property. This tab is essential for keeping track of leases, payment terms, and tenant contact information.
📋 What You Can Do in the Lease & Tenant Info Tab
- Add a new lease to a property.
- Edit or view details of current and past leases.
- Manage tenant profiles and their contact details.
- Upload lease agreements and related documents.
📝 Adding a New Lease
- Click on the Lease & Tenant Info tab for the selected property.
- Click the Add Lease button (➕ icon).
-
Fill in these fields:
- Start and End Dates – Define the lease period.
- Rent Amount and Deposit – Enter financial details.
- Payment Frequency – Choose Monthly, Weekly, etc.
- Tenant – Select an existing tenant or create a new one.
- Upload Lease Document – Attach the contract if available.
- Click Save to complete the lease setup.
👤 Managing Tenant Details
On the right side of this tab, you’ll see the tenant’s profile, which includes:
- Name, phone number, and email address.
- File number and gender.
- Profile photo for quick identification.
- Address of the tenant.
You can update tenant details or upload supporting documents like IDs directly from this section.
💡 Tips
- Always ensure lease dates and rent amounts are accurate before saving.
- Use descriptive filenames when uploading lease documents for easy retrieval later.
- You can switch between multiple leases if the property has had different tenants over time.