📊 Test Entry, Conclusion Writing & Final Report Handling
🎯 Purpose of This Page
After a specimen has been collected and received , it's time to perform the tests , record results , and document clinical interpretations .
This is all done within the Laboratory Request Detail View , which provides the workspace for handling test data and producing the final patient report .
🔍 Where You’ll Work
You’ll work within the Laboratory Page , focusing on these tools:
- ✅ Tests Tab
- 📝 Conclusion Tab
- 🔐 Lock & Print Tools
These tools allow you to transform raw results into a clear, verified, and professionally formatted lab report.
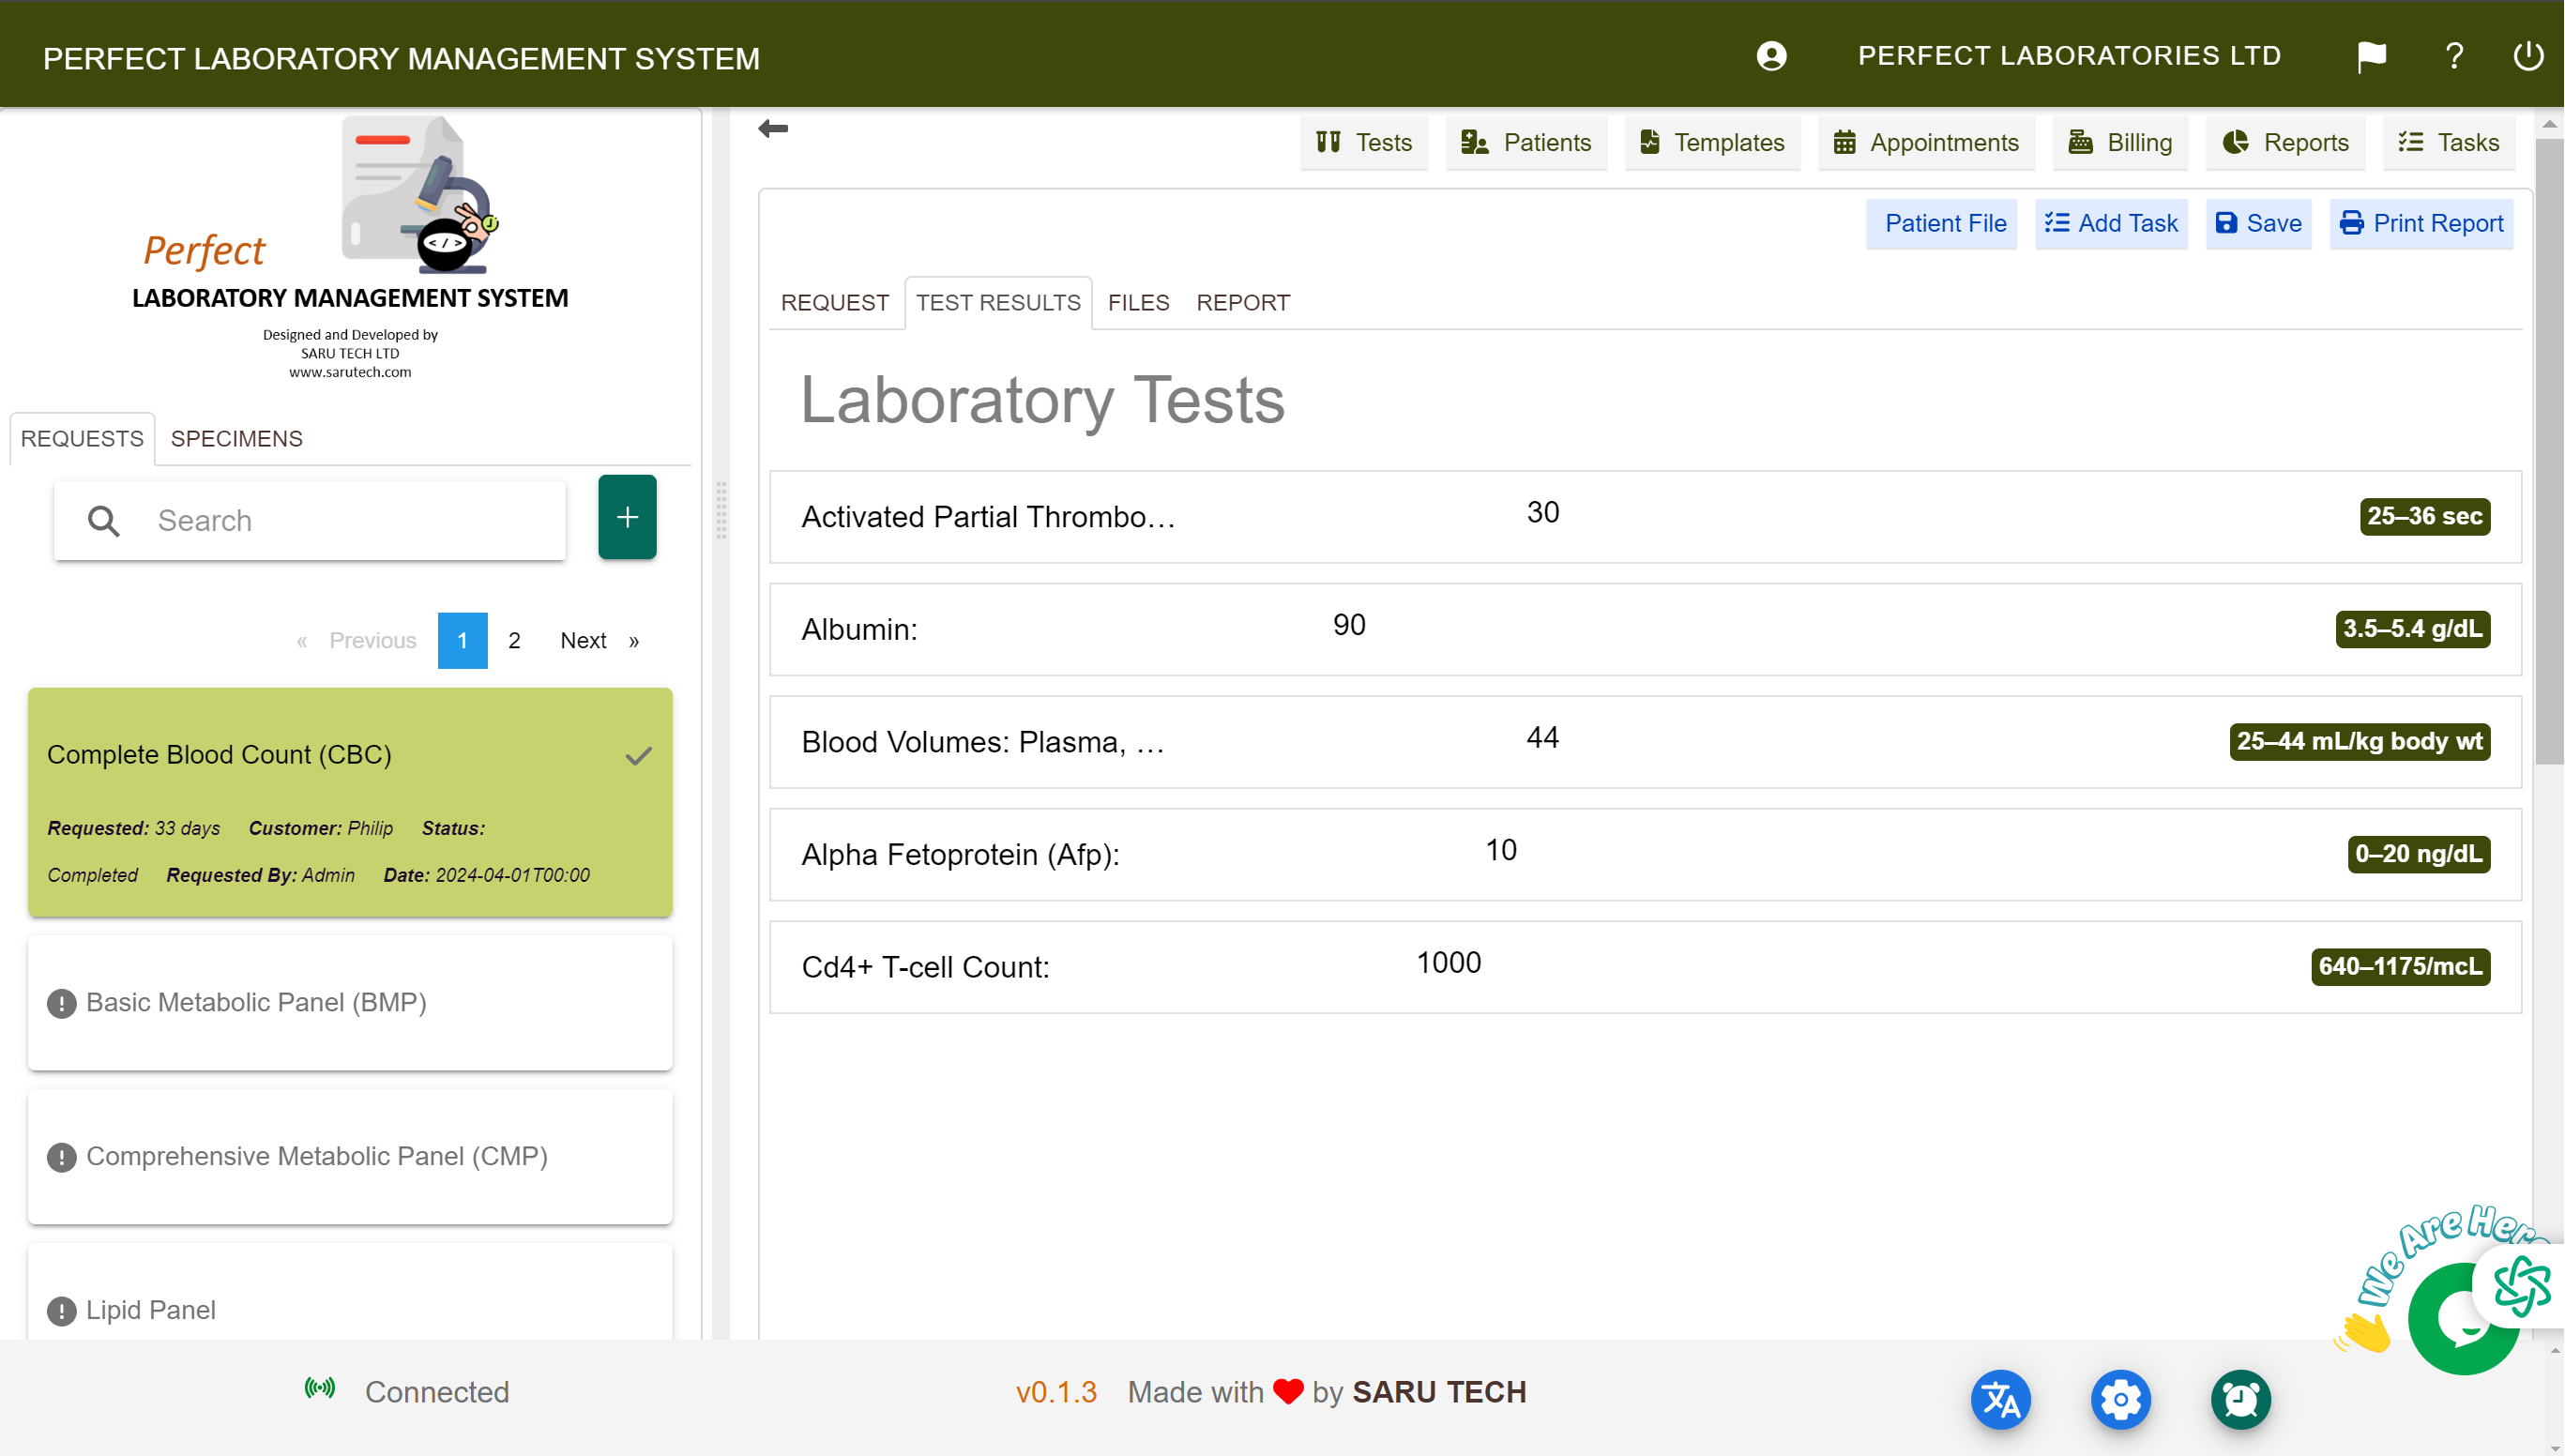
🧪 Entering Test Results
🧭 Navigate to the Tests Tab
- Click the Tests tab in the top navigation.
- View the list of added tests and panels.
📦 Test Packaging & Result Units
The system supports organizing tests into **packages** to streamline ordering and billing processes. By default, it comes with several predefined test panels , but administrators can configure additional packages as needed.
The system uses a parent-child hierarchy for packaged tests:
- ✅ Selecting a parent test (e.g., "Lipid Panel" ) automatically includes all associated subtests.
- 📋 Subtests are displayed beneath their parent test for easy management.
Users have the flexibility to:
- 💵 Bill by Package: Charge a single price for the entire panel.
- 🧪 Bill by Individual Test: Charge separately for each selected test.
Adding a test or panel to a request automatically updates the patient’s bill with the corresponding cost.
| Type | Description & Layout |
|---|---|
| 🧪 Single Test | Displays as a standalone item with a single result input field (e.g., “WBC Count”). |
| 📋 Panel Test | Groups multiple related tests under a parent heading (e.g., “Liver Function Panel” includes ALT, AST). |
💡 Tip: When entering results, units are displayed for each test automatically, and administrators can configure SI units or conventional units in the Test Template settings.
✍️ Enter Results
For each test or subtest:
- Result Field: Enter numeric or text value (e.g., 12.3, “Negative”)
- Unit: Automatically shown (mg/dL, mmol/L, IU/L, etc.)
- Validation: Results may be color-coded if outside normal range (if configured)
⚠️ Note: Units cannot be edited here; they are pre-configured in the Test Template settings by your admin.
🔄 Switching Units (SI vs Conventional)
Above the test list, use the Unit Dropdown to toggle between:
- 🔢 SI Units (e.g., mmol/L)
- 📏 Conventional Units (e.g., mg/dL)
💼 Expenses Tab – Tracking Operational Costs
Expenses are internal costs related to completing a lab request.
| Type of Expense | Example |
|---|---|
| 🚚 Transport / Courier Fees | For sending samples to external labs |
| 🏥 Third-party Test Charges | If an external lab performed some tests |
| 🧪 Materials Used | Extra test kits or rare reagents |
| ⏱️ Staff Overtime | Special handling during late or off-hours |
🛠 How to Add an Expense
- Go to the Expenses Tab .
- Click “Add Expense” .
- Enter details such as description, amount, and payment method.
- Optionally: select Add to Bill to charge the patient.
- Click Save .
🔐 Note: Once the lab report is locked, expenses can no longer be modified.
📦 Viewing Expense History
Each expense card shows:
- 📝 Who added it
- 📅 When it was added
- 💳 Payment method
- 📥 Whether it’s included in the bill
📋 Task Assignment, Timeline Audit Trail & Permissions Control
📋 What Are Tasks in the Laboratory System?
Tasks allow lab users to assign specific follow-up actions linked to a lab request. These tasks can include administrative duties or clinical actions such as rerunning a test, contacting a patient, or verifying outsourced results.
🧭 Where Tasks Appear
Tasks are found in the Tasks Tab within a specific lab request. They are always tied to one request and cannot exist independently.
🛠 How to Add a Task
- Open the relevant lab request.
- Go to the Tasks Tab .
- Click “Add Task” .
-
Fill out the form:
- Title: Short description (e.g., “Verify ALT result”)
- Assigned To: Staff member or role
- Due Date: When the task should be completed
- Status: Open, In Progress, Completed
- Description: Additional details if needed
- Click Save .
Once saved, the task appears in the tab and in the assigned user’s task list if applicable.
✅ Managing Tasks
Tasks are displayed as cards and include:
| Field | Description |
|---|---|
| 📌 Title | Task subject (e.g., “Call patient for re-test”) |
| 📊 Status | Open, In Progress, Completed |
| 👤 Created By | The user who created the task |
| 👥 Assigned To | Person or team responsible |
| 🕒 Timestamp | Date/time of creation and updates |
🔐 Note: Once the lab report is locked, tasks cannot be modified.
📄 Writing the Diagnostic Conclusion
📘 What Is the Conclusion?
The Conclusion Tab is where you summarize findings in plain language — especially important for panels or abnormal results. Examples:
“Findings consistent with mild iron deficiency anemia.”
“Liver enzymes elevated; possible hepatocellular injury.”
Clear conclusions help clinicians interpret results more effectively.
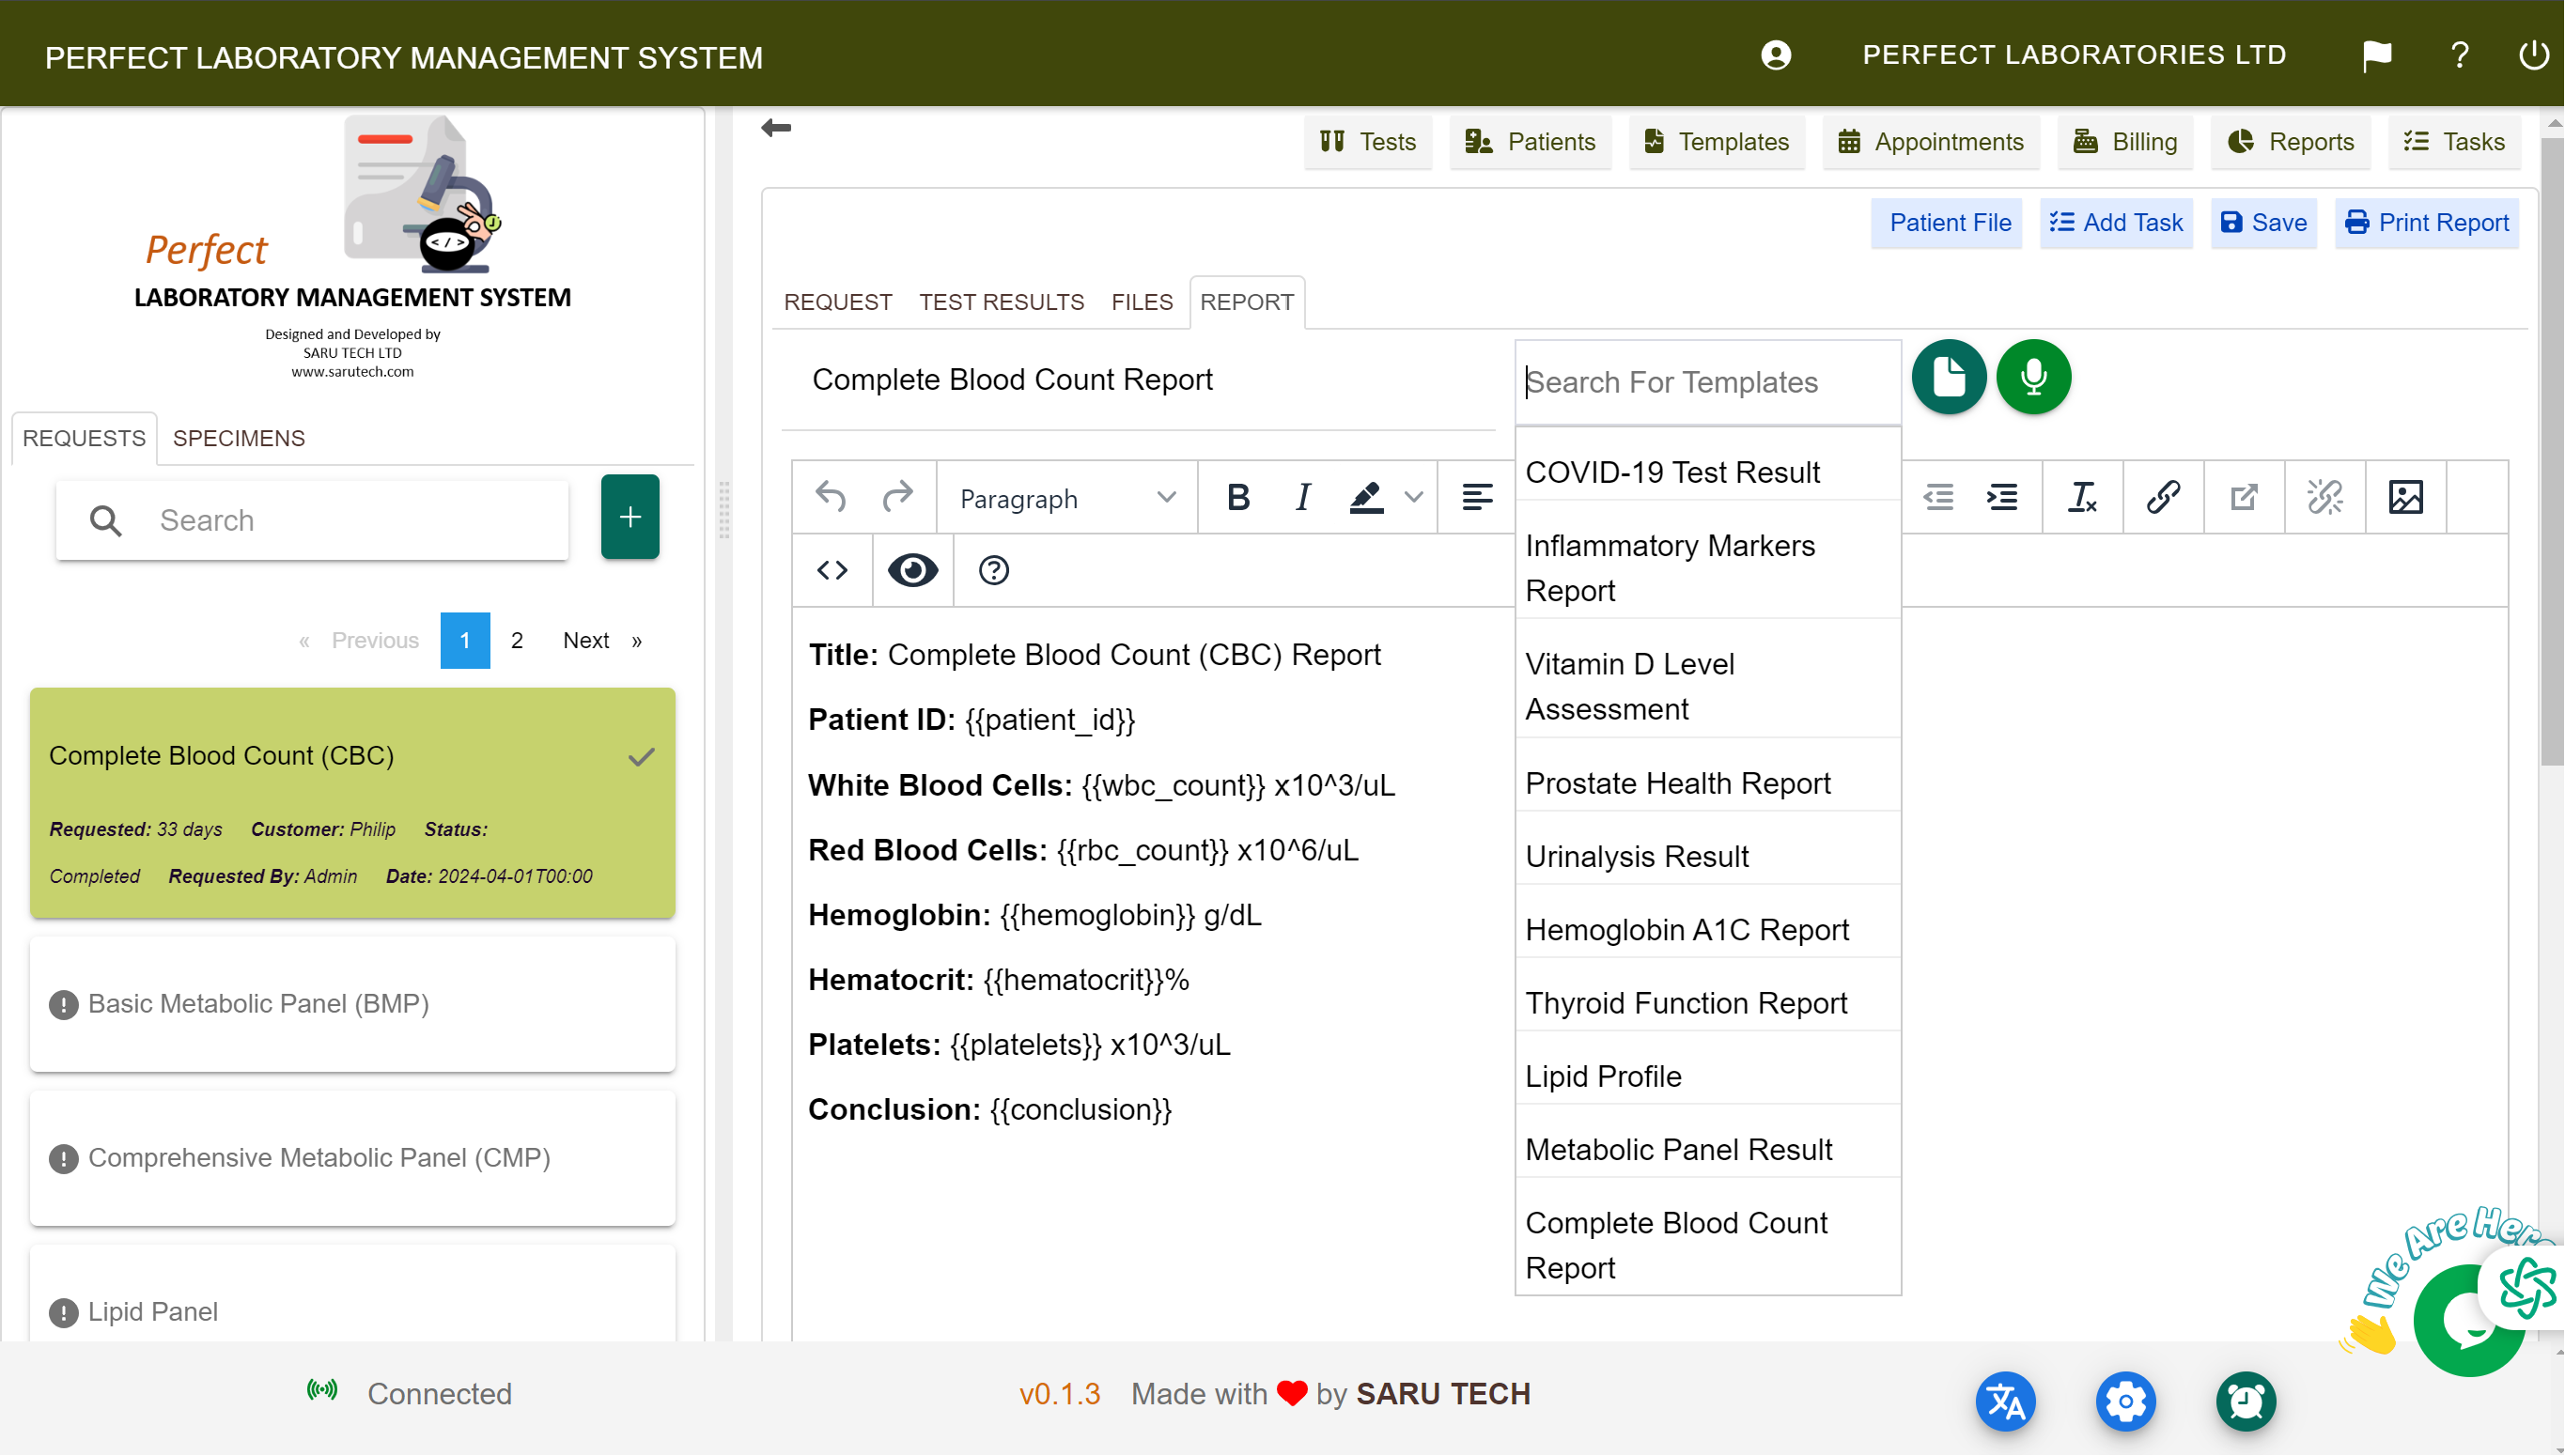
✨ Using Templates
To use predefined conclusion templates:
- Click the “Templates” dropdown or icon in the Conclusion Tab.
-
Select a phrase, such as:
- “Please correlate with clinical findings.”
- “Suggest repeat test in 3 months.”
- The text will populate the editor. You can modify or append as needed.
🛠 Admins can create or edit templates from the Templates Page .

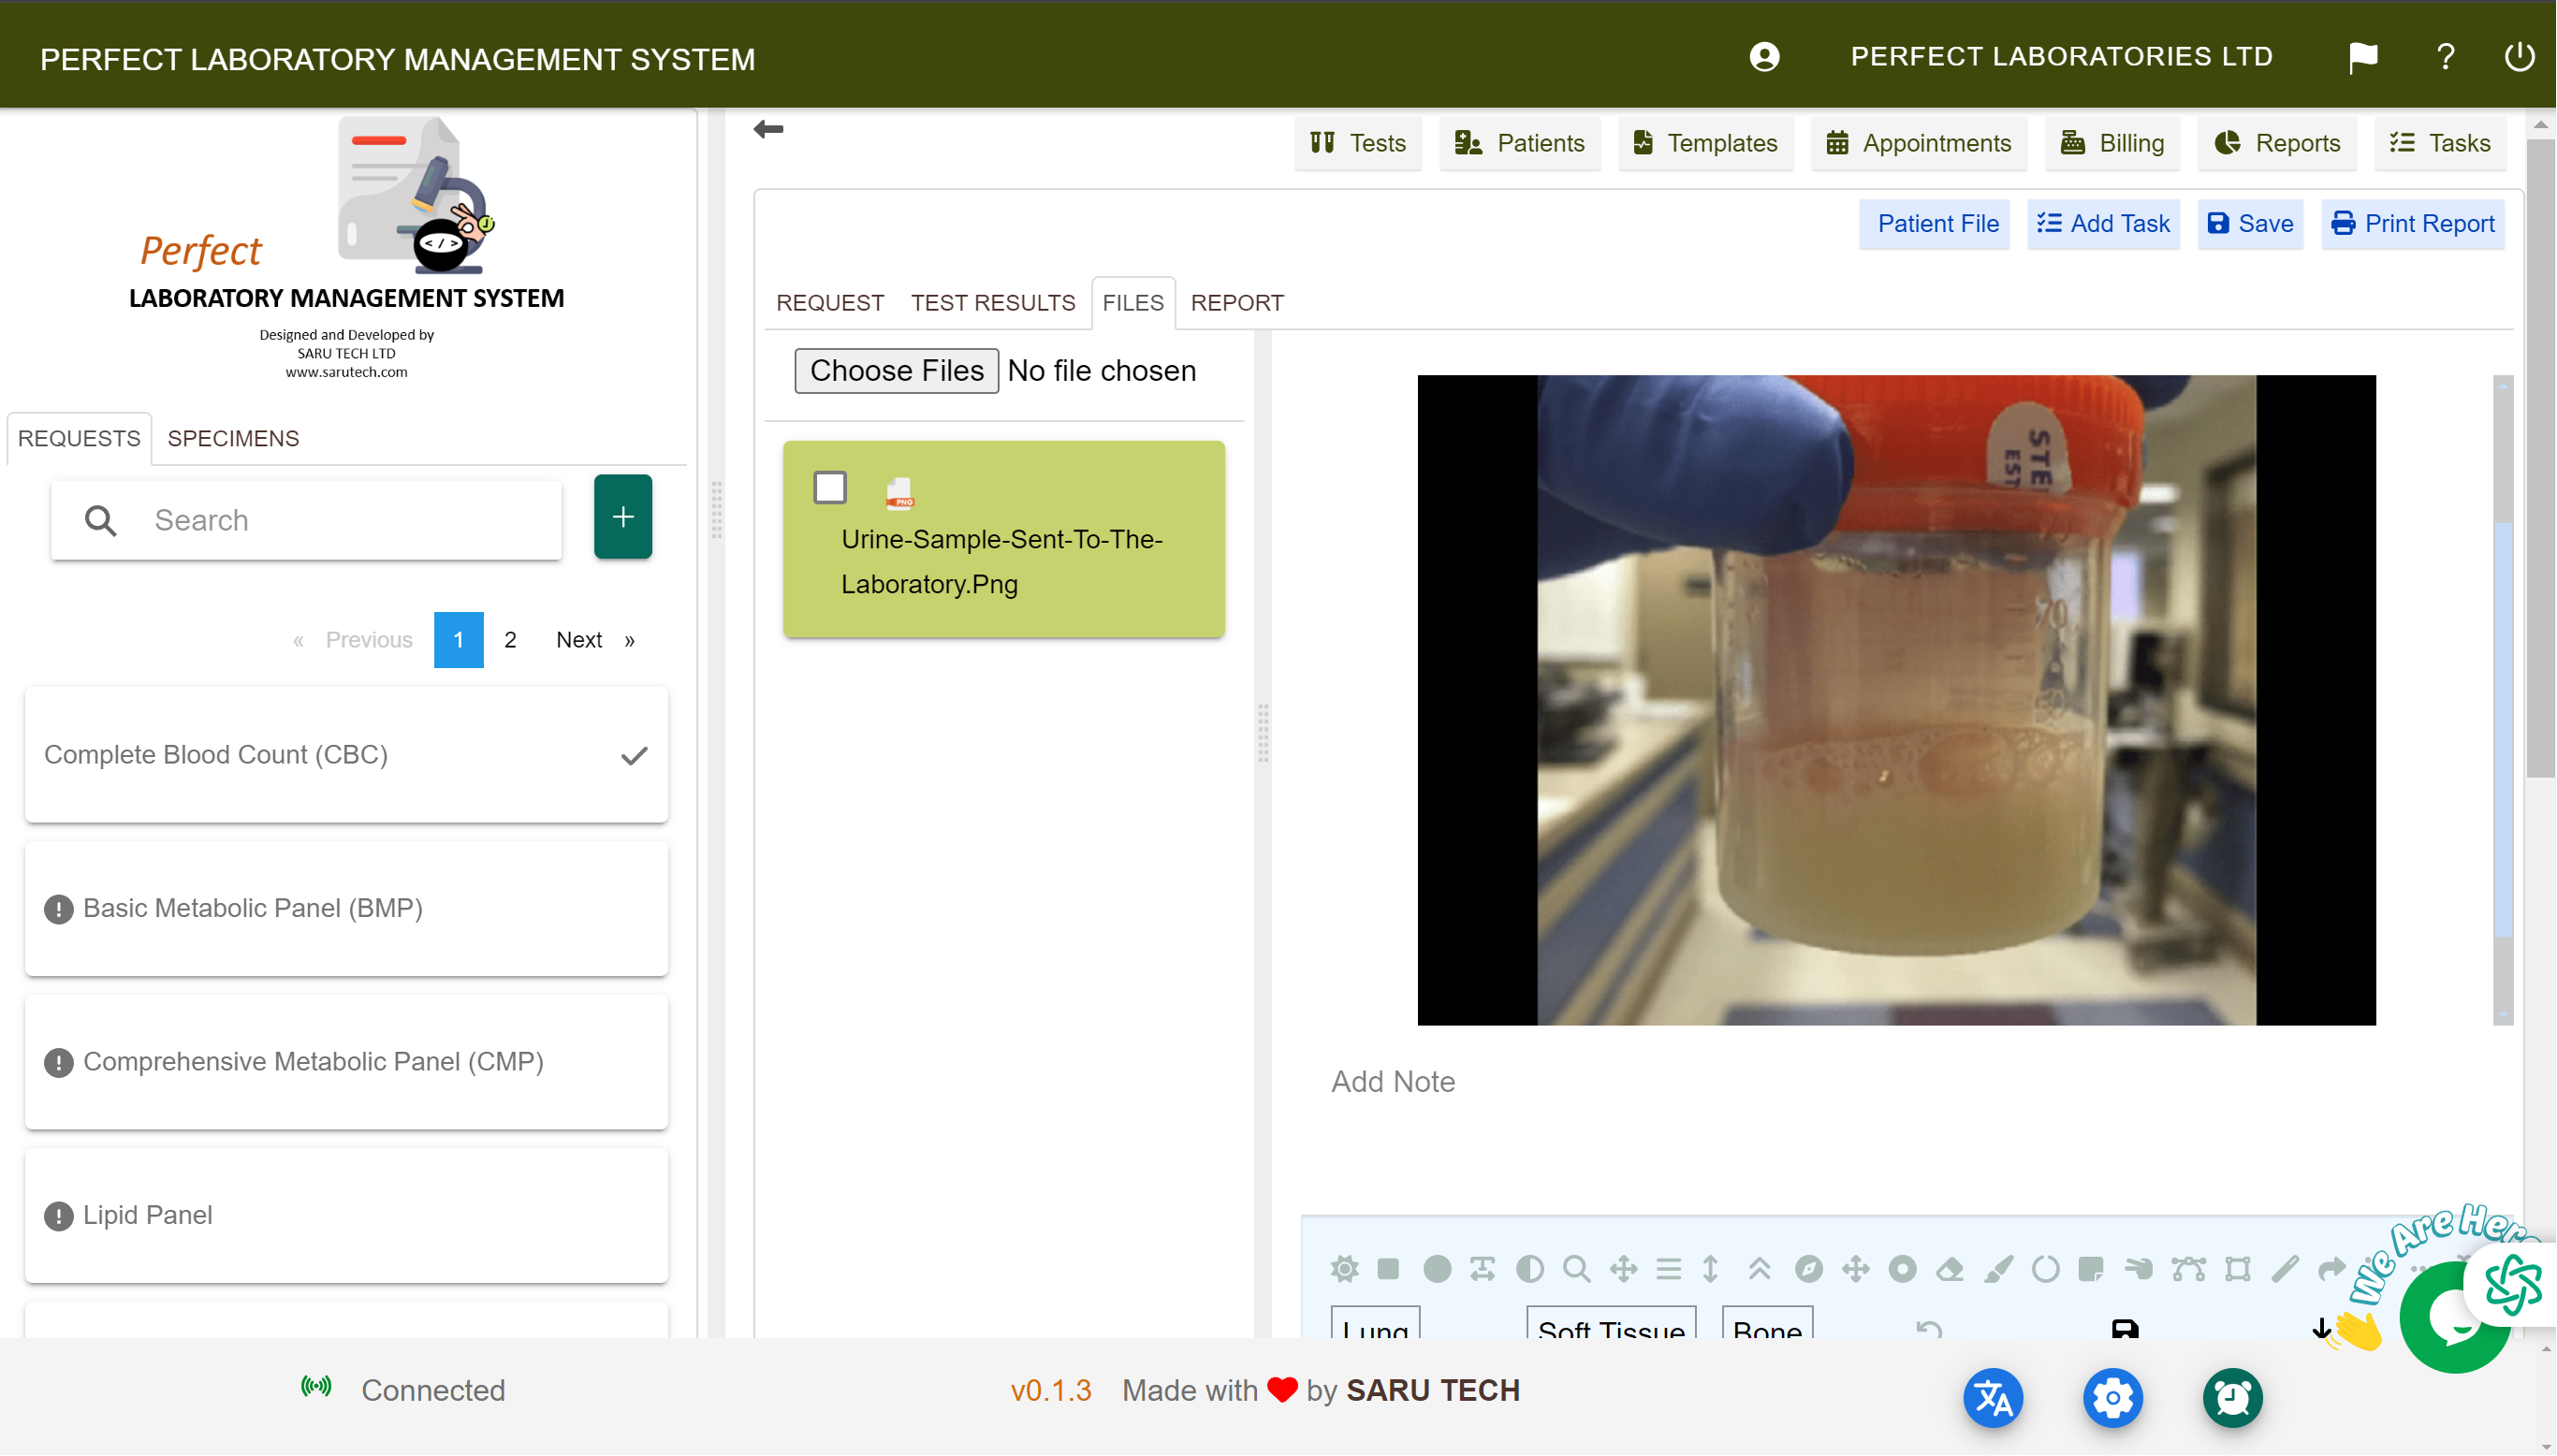
📎 Attaching Files
Enhance your reports by adding supplementary materials:
- 📄 External lab result PDFs
- 🖼️ Images (e.g., microscope or device photos)
- 📊 Machine-generated outputs
In the Files Tab , you can:
- 📤 Upload attachments
- 📥 Download previous reports
- 🔍 Preview files directly in the browser
✅ When selected, these attachments are embedded in the final PDF report.
🔒 Locking the Report
🔐 What Does “Lock Report” Mean?
Locking prevents further editing of:
- 🧪 Tests
- 🧫 Specimens
- 📝 Conclusion
- 💬 Comments and Expenses
🛑 It is the final step before printing or sharing the report.
✅ How to Lock the Report
- Review all tabs: Tests, Conclusion, Files, Billing.
- Click the “Close button” in the toolbar.
- Confirm when prompted.
Note: Only authorized users (e.g., Supervisors or Validators) can lock/unlock reports.
Once locked:
- 🔒 Fields become read-only
- 📤 SMS and Email buttons are activated
- 📝 The timeline logs this action for audit tracking
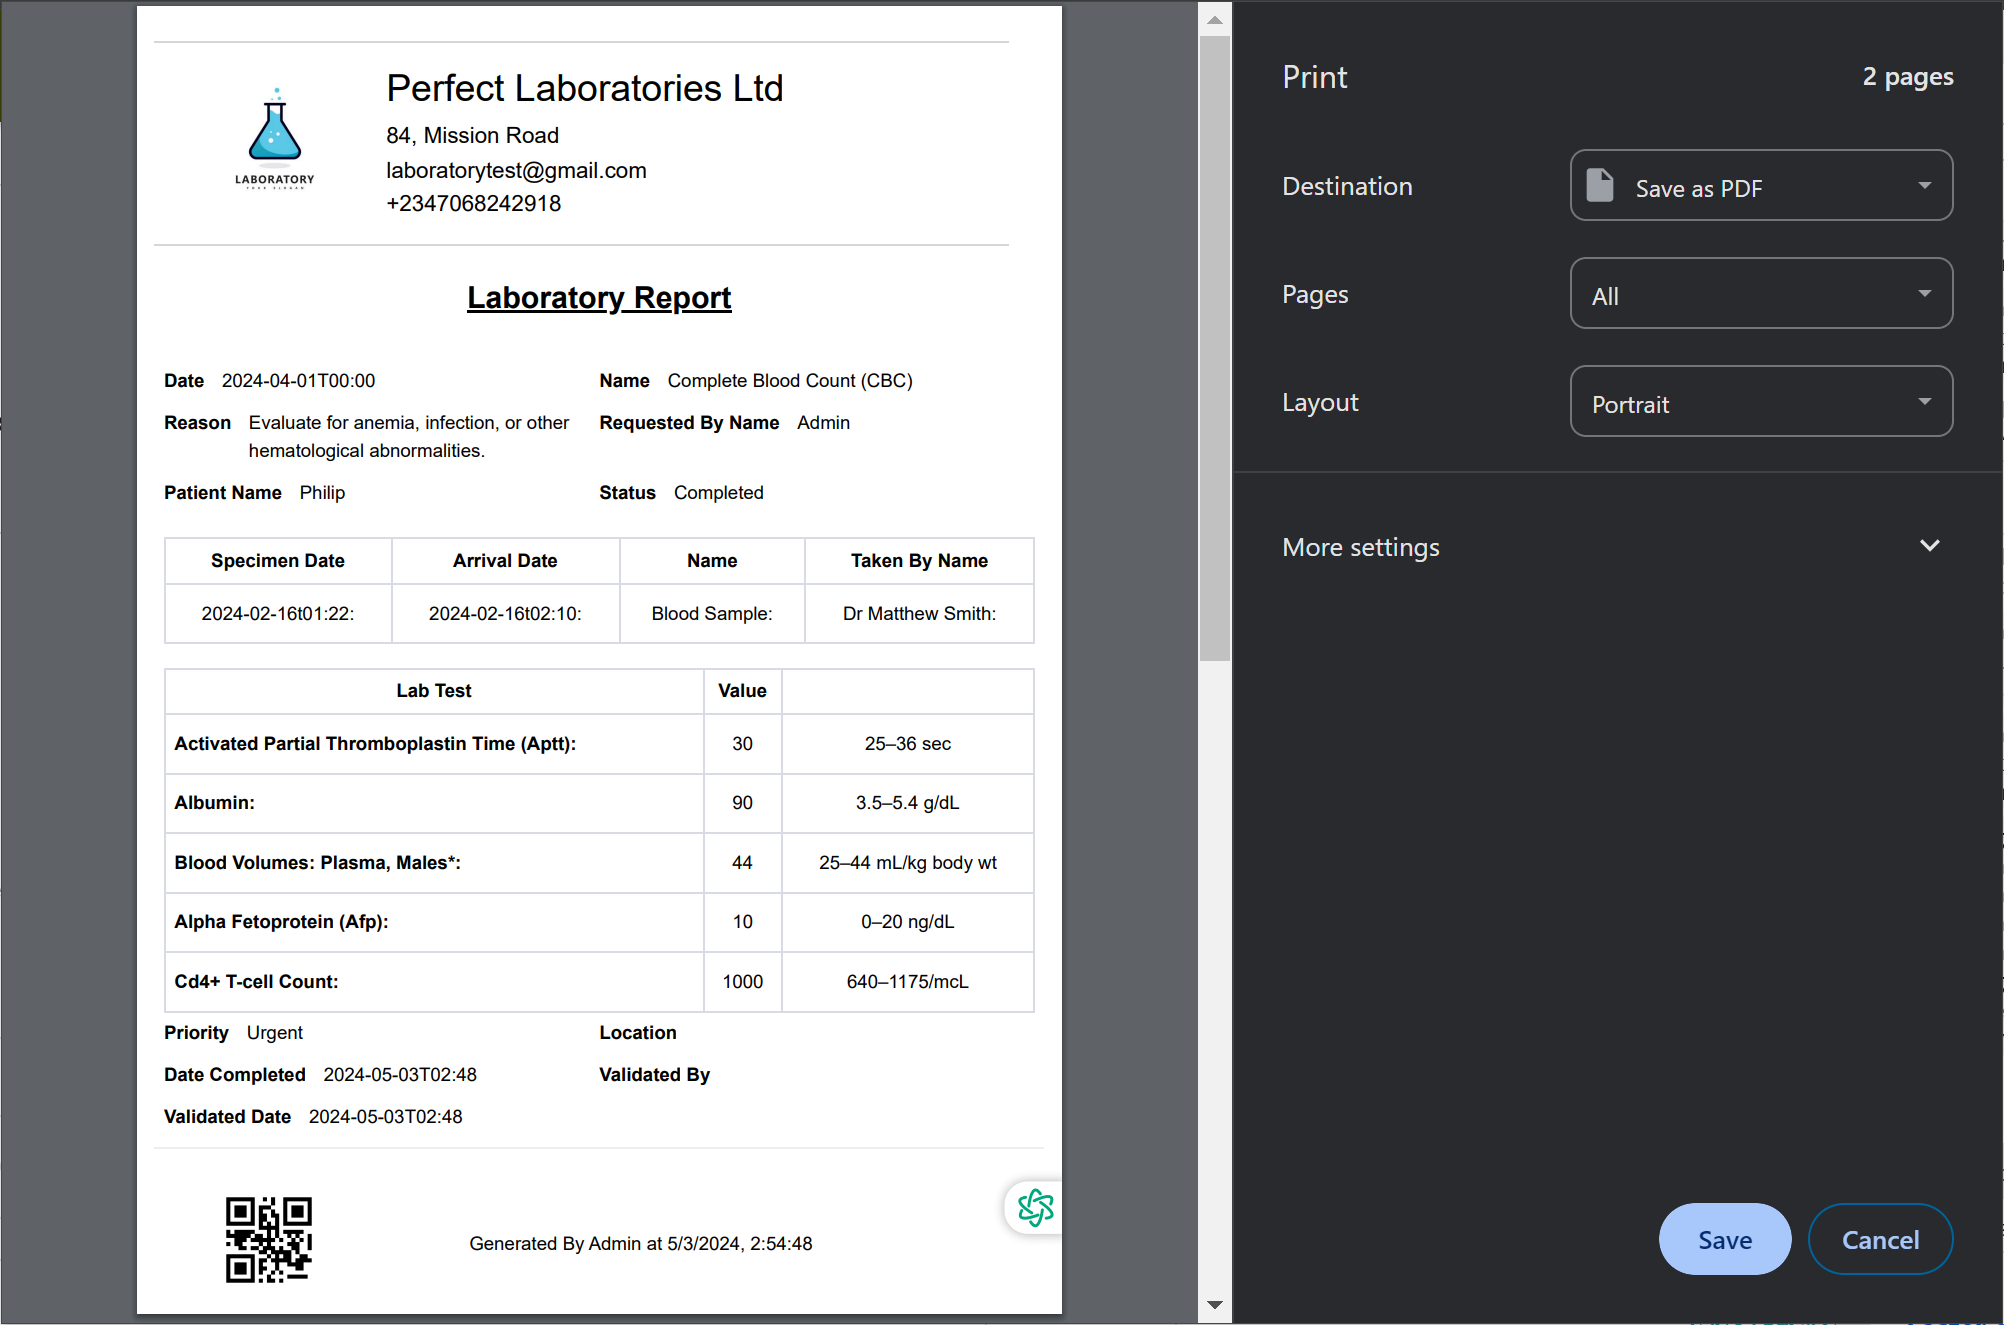
🖨️ Printing the Lab Report
After locking, you can generate and print a clean, professional report for patients or referring physicians.
You can choose to include the following details in the report:
- 👤 Patient demographics
- 🧪 All test results and units
- 📝 Notes and comments
- 📋 Conclusion
- 📁 Attached files (if selected)
📤 Available Formats
- 🖨️ PDF: For emailing or printing
- 📥 CSV/Excel: For bulk data export
- 📄 HTML/Print View: For browser-based printing
📤 Communication: SMS and Email Features
After locking, you can notify patients or referring doctors using:
Purpose: Share the final report or send notifications.
- Click the Email button.
- The system uses the patient’s registered email address.
-
Optional:
- Attach the report as a PDF
- Add a custom message (e.g., “Results are ready. Please check your portal.”)
Tip: Ensure the patient’s email is updated in their profile for seamless delivery.
📱 SMS
Purpose: Send brief notifications (e.g., “Your lab report is ready”).
- Click the SMS button.
- Edit the default SMS template if needed.
- The system sends the SMS to the patient’s registered phone number.
Note: SMS content is kept brief and does not include sensitive results.
💡 Message Delivery Tracking
- 📤 “SMS sent to +44xxxxxx”
- 📧 “Email sent to john.doe@example.com”
✅ Every communication is logged in the timeline for transparency.
📌 Reminders and Best Practices
| Action | Tip |
|---|---|
| 💾 Always Save Before Locking | Unsaved changes will not appear in the final report. |
| 📧 Confirm Patient Contact Info | Ensure email and phone numbers are correct before sending notifications. |
| 📋 Use Templates to Save Time | Templates help maintain consistency across all diagnostic conclusions. |
| 🔒 Lock Only When Fully Complete | Once locked, edits require supervisor override. |
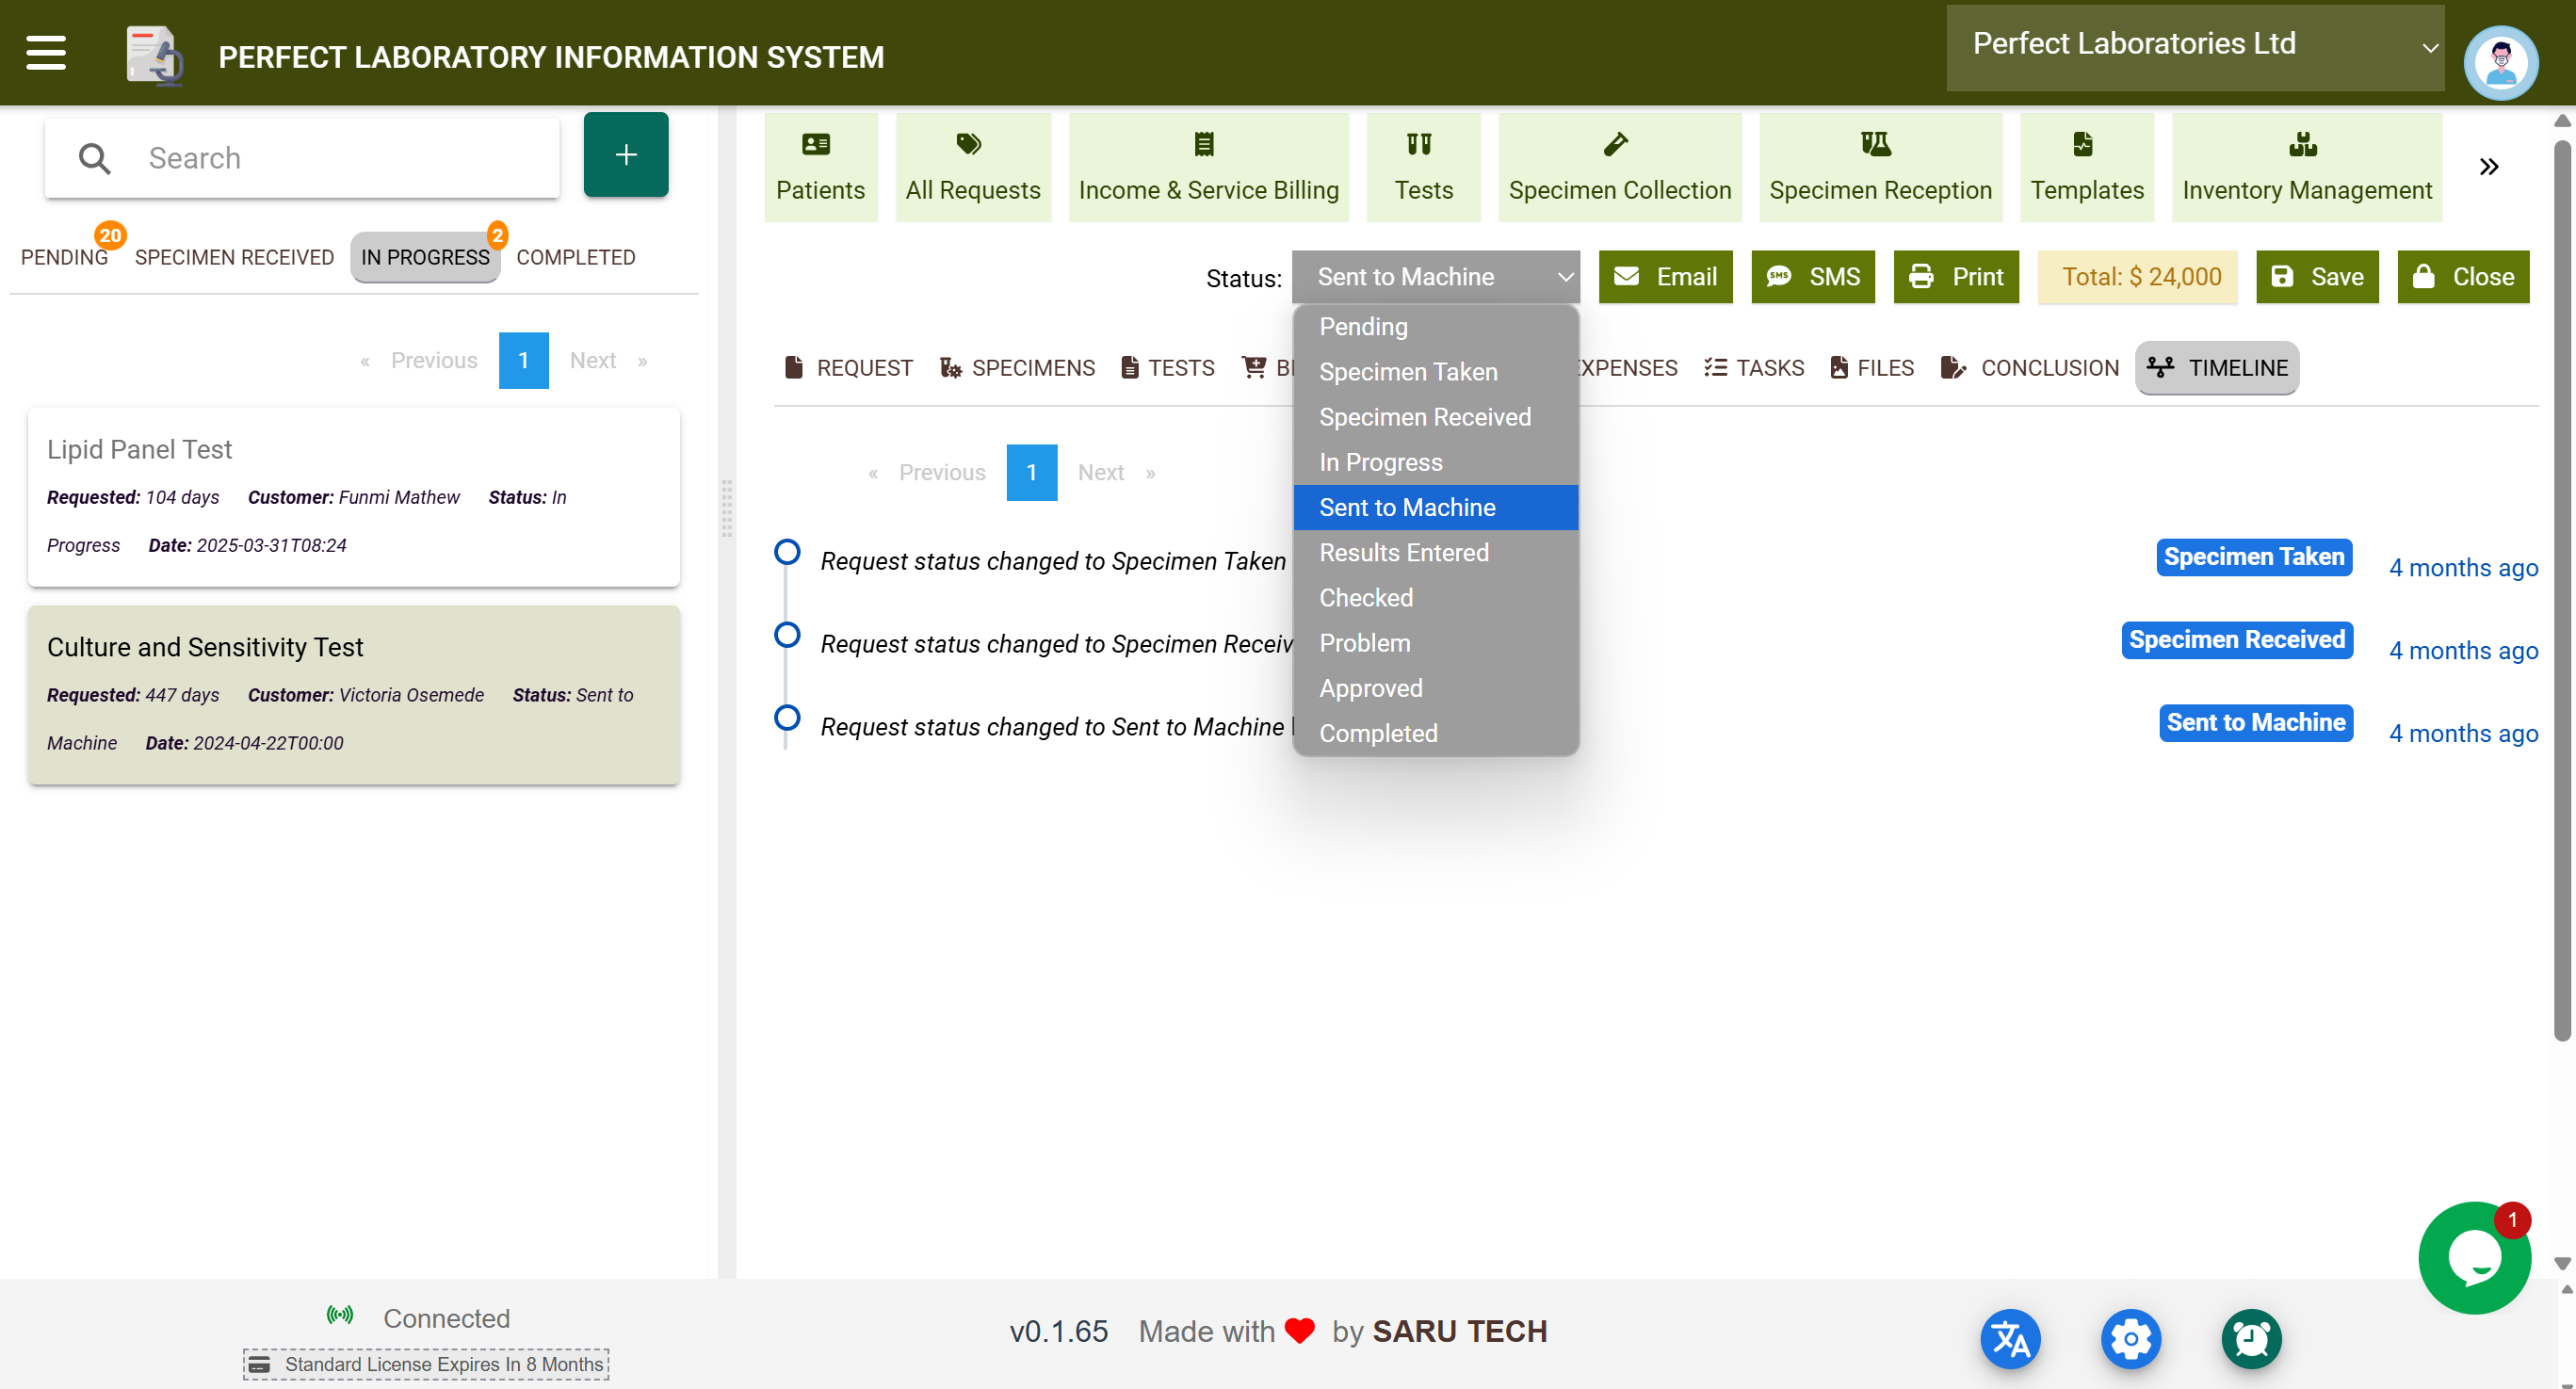
🕓 Timeline Tab – The Full Audit Trail
Every lab request contains a Timeline Tab that logs key actions automatically. This ensures transparency, traceability, and accountability across the lab workflow.
🧾 What Is Logged in the Timeline?
| Action Type | Example Entry |
|---|---|
| 🔄 Status Change | “Status changed from ‘Specimen Taken’ to ‘Specimen Received’ by User A” |
| 🧪 Test Added or Removed | “User B added Glucose Test to Request #0450” |
| ✍️ Result Entry or Edit | “User C entered ALT = 35 U/L” |
| 💵 Bill or Expense Update | “Discount of 15% applied by Billing Officer” |
| 🔐 Locking or Unlocking Report | “User D locked the report” |
| 📋 Task Added or Completed | “Task ‘Verify sample’ marked as Completed by Lab Manager” |
The timeline provides an unalterable audit trail for investigating issues, defending clinical decisions, or supporting performance audits.